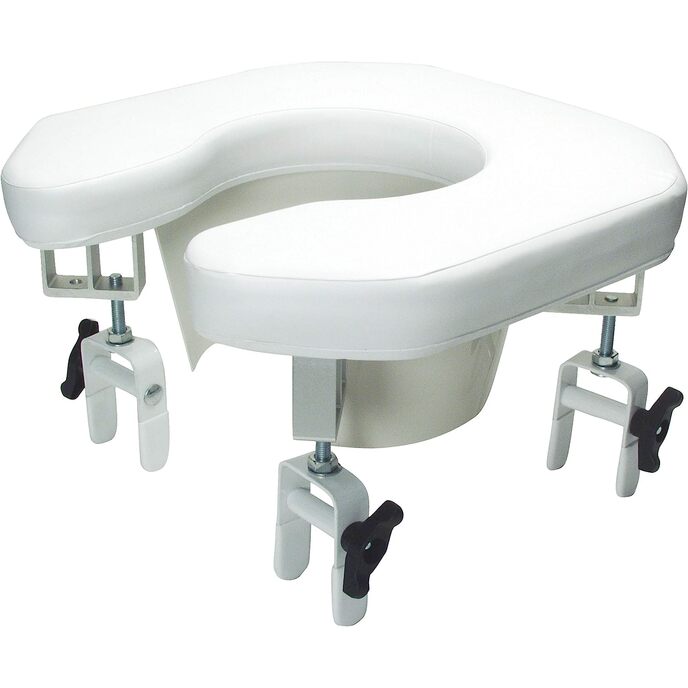
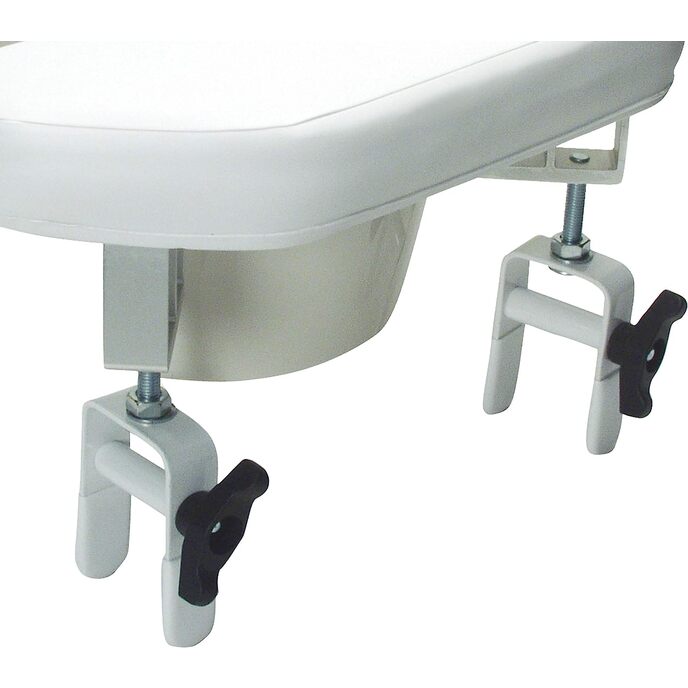
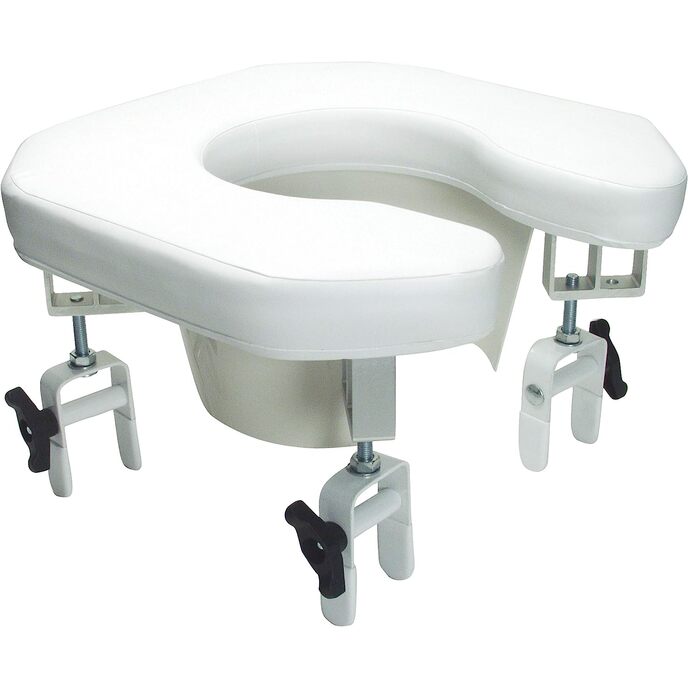
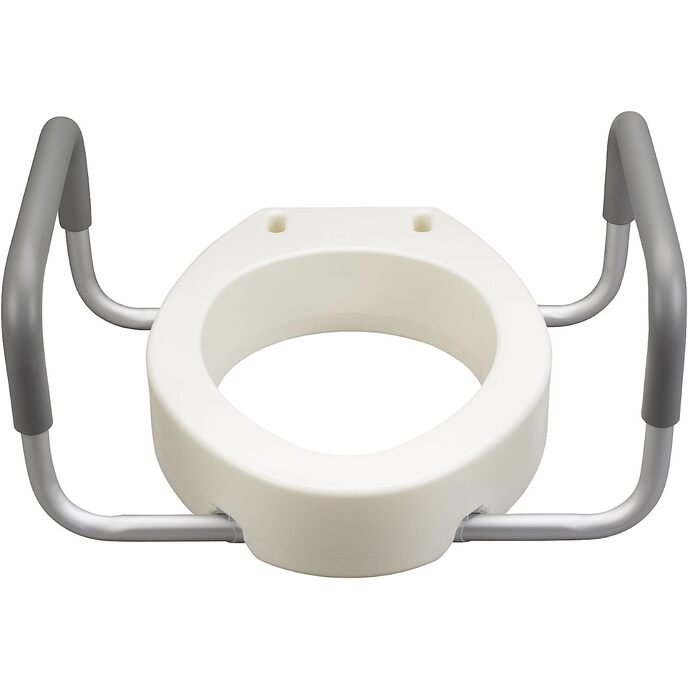
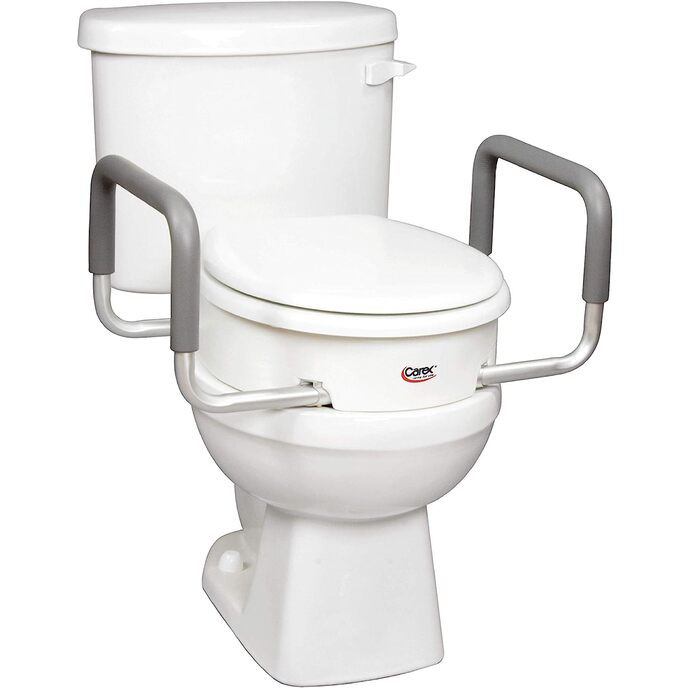
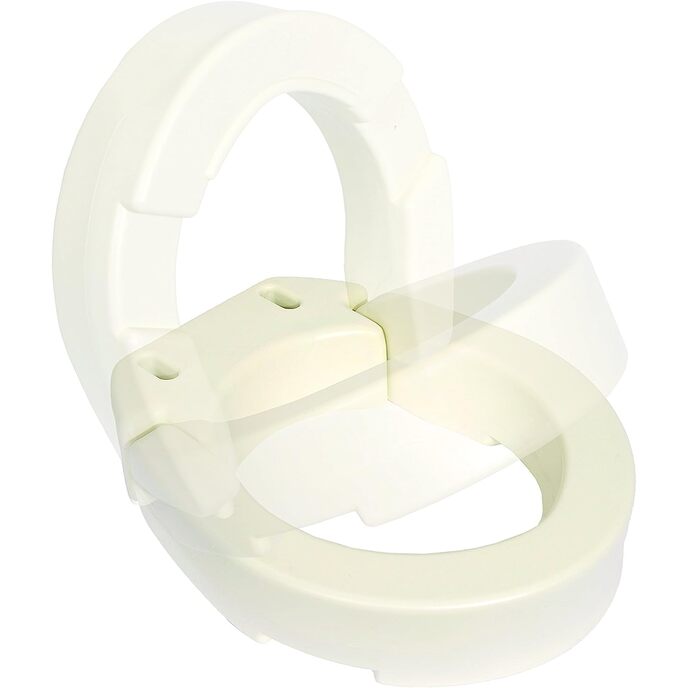
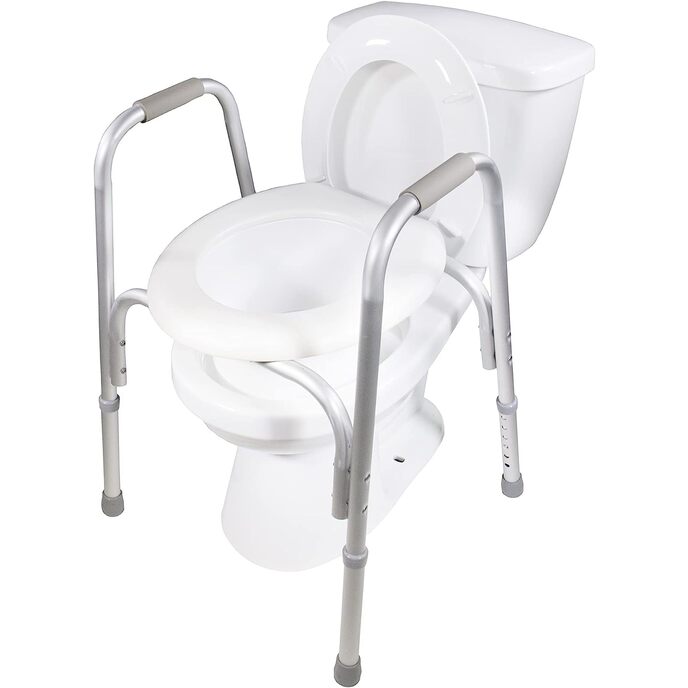
First off, I KNEW from reading the other reviews that this wouldn't fit properly on my round toilet. I was surprised how badly it "fit," but if you don't mind it tipping underneath you, it's actually us ble (though not necessarily SAFE!) without modifications. This model has about two inches of padding instead of the four inches it used to come with, but thankfully the vinyl that covers it is no longer fused together in a ring around the inside, which was a recipe for cutting your fanny! (Obviously THAT change wasn't made after consulting paraplegics, or having ANYBODY sit on the thing for five minutes!) The vinyl cover is applied just like it was on the 4 inch seat we knew and loved, so kudos for that. I wish it still had 4 inches of foam though. The rubber covers on the bottom of the clamps are VERY cheap, and will fall off almost immediately. You'll end up flushing the interior ones away by accident, and the outer ones will fall off almost every time you clamber aboard. The solution I found was to put a few drops of rubber cement in each one, then slip them into place. Use enough rubber cement so a bit oozes out the top on either side, which glues the rubber covers in place from top to bottom. They still split along the edges after a few months, but have remained glued in place - so far. I cut out a bunch of one-inch squares of cardboard from an apple box, then stacked two or three of them together and wrapped them in duct tape. I put one of these tape-covered squares under each of the clamps, inside and outside the toilet rim, and that keeps the clamps from slipping and makes them more stable if they don't quite fit. (This isn't very effective unless you actually relocate the clamps on a round toilet.) It also keeps them from scratching or leaving rust marks on your toilet. I've used duct tape squares with this model of toilet seat going back 25 years now, and recommend that everyone do it. This also puts less stress on the rubber covers you should glue to the bottom of the clamps. The bolts that can be used at the top of the clamps to lock them in place are unnecessary, so use them or don't, it won't make any difference, although using them means that it will take longer to remove the clamps if you need to - for example, taking your chair with you on vacation and packing it in the box it came in for the trip. Keep in mind that the vinyl of this model invariably starts to split, at which point I remind you that DUCT TAPE IS YOUR FRIEND! Tape up the seat the second the first split appears, and add more tape as more splits appear. When the whole seat is covered with tape, you can pull it off occasionally and replace it (for sanitary purposes) although at this price, I'd just buy a new one. White duct tape looks best, although it also shows stains (as does the vinyl) so if you want to go with standard grey tape, it won't show stains, will be just as functional and a bit cheaper - but will look pretty shoddy to any visitors! At this point if you have an elongated toilet, my review is finished and you're probably going to be fairly happy with this seat. Ok, here's what to do if you're trying to use this seat on a circular toilet. In my case I checked the locations of the clamps on this seat in relation to my previous seat which DID fit a circular toilet, and unscrewed and re-positioned the clamps on this seat accordingly. It IS possible to turn this into a fairly stable platform - not as stable as the previous design, which was cut slightly differently, but stable enough so it doesn't rock underneath you even though it's not as as tightly in place as my old chair. Still safe enough for daily use, so if you are up for a bit of measuring and drilling (or are strong enough to twist a screw into a solid board) this seat CAN be modified. It MAY be possible to come up with an absolutely perfect fit, I just didn't manage it, but the cardboard squares wrapped in duct tape I put at the bottom of each clamp help. In retrospect, the easiest and possibly most accurate way to mark where to relocate the clamps might be to unscrew all the clamps from both the old and new seats, paint around the holes of the old one, then line it up with the new seat and lay it directly on top of it, the bottom of one chair pressed against the bottom of the other, and you'll get 8 circles of wet paint showing you where to screw in the clamps. I can't say that this will work from personal experience, but it seems logical. Your results may vary of course. Update 1/31/2017 I stand by my 3 star rating since every seat I've had of this model (10 or so) has had the vinyl of the seat split, although I used to be able to buy one that fit on a round toilet. Here's the wear and tear so far... After two and a half years, the vinyl seams on this seat are splitting at a faster rate they used to, compared to the same model going back 30 years. I don't spend nearly as much time on this seat as I did with its predecessors, yet the back split in less than a year, the right side split a few months later, and the left side a couple of months ago. Again, DUCT TAPE IS YOUR FRIEND! I immediately taped the split seams, which removed the danger of cutting my skin on a sharp seam. Currently the right side of the seat is about 1/2 split on top, the left less than an inch, and the back about 3 inches horizontally, and the vertical seam in the back split completely and was the first to go. The rubber covers over the clamps split and disappeared during the first few months even though I glued them on, which never used to happen, so it's clear that they're cheap imitations of what used to come standard with this seat model - before it was manufactured in China. So my toilet now has rust marks from where the clamps hold the seat in place, but my 10 year old seat that was almost nothing but duct tape was just as rusty. It simply took it a few years longer to rust because the rubber covers on the clamps lasted for years. This seat has never been as stable as a seat designed for a round toilet, and I've had adventures where the clamps came off of the toilet while I was transferring to and from the seat. So the current model isn't nearly the quality as these used to be, (half as much padding!) but if you want this style of seat, it's the only game in town. I look forward to eventually trying this on an elongated toilet to see if it will clamp solidly, or if I'll be wobbling like I do now on my round toilet even after I did a bit of carpentry to move the clamps to "fit." (Yeah, I'll have to move the clamps back to their original positions, but that's not hard.)