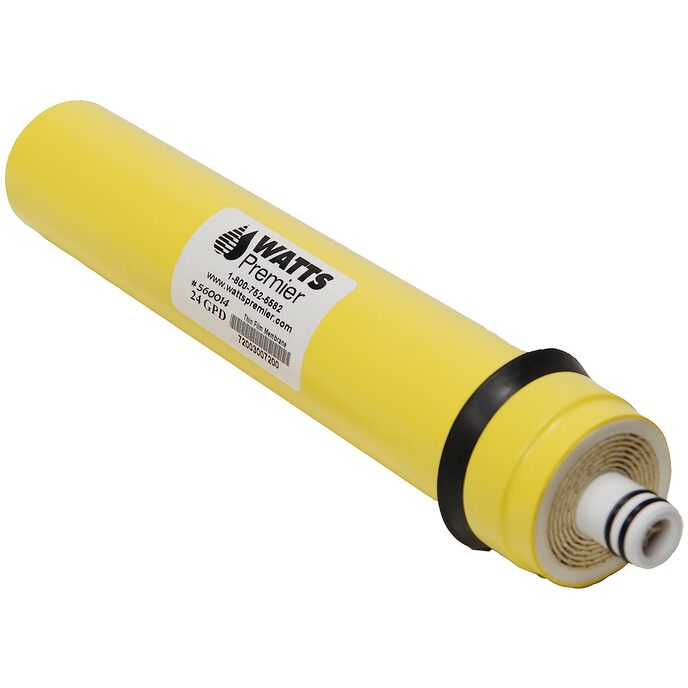
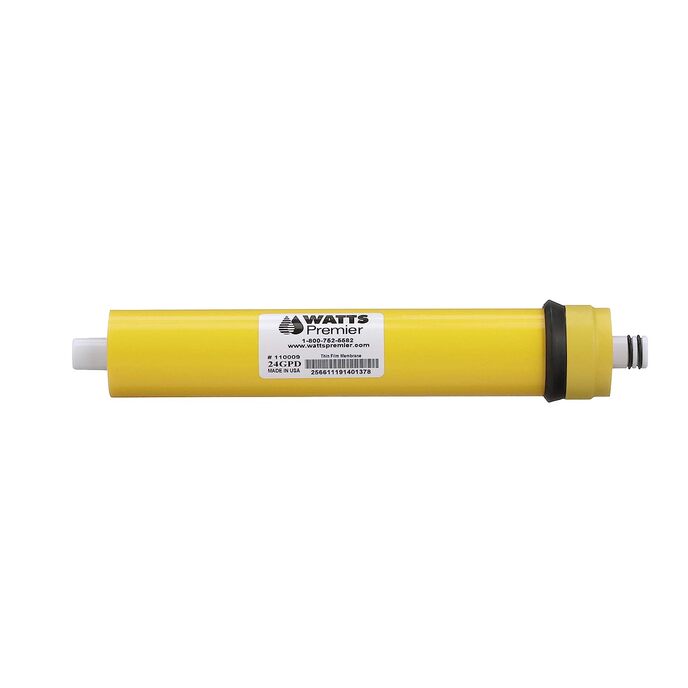
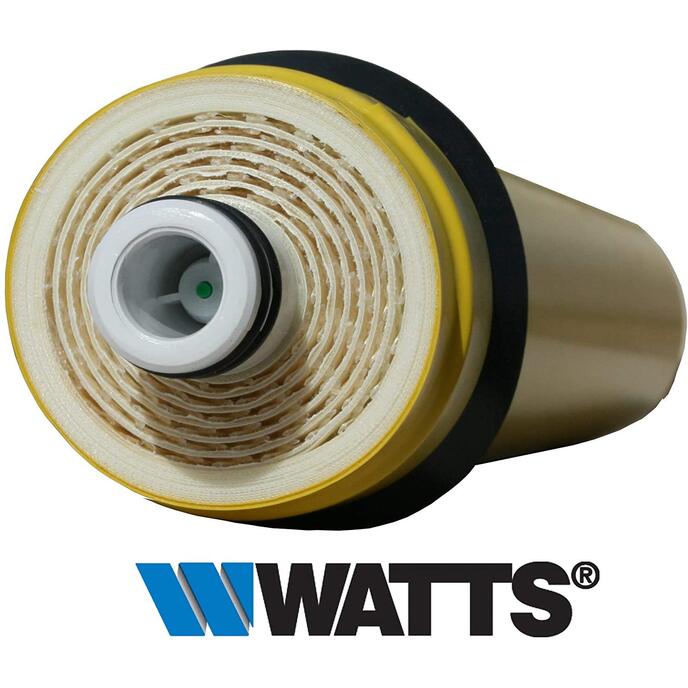
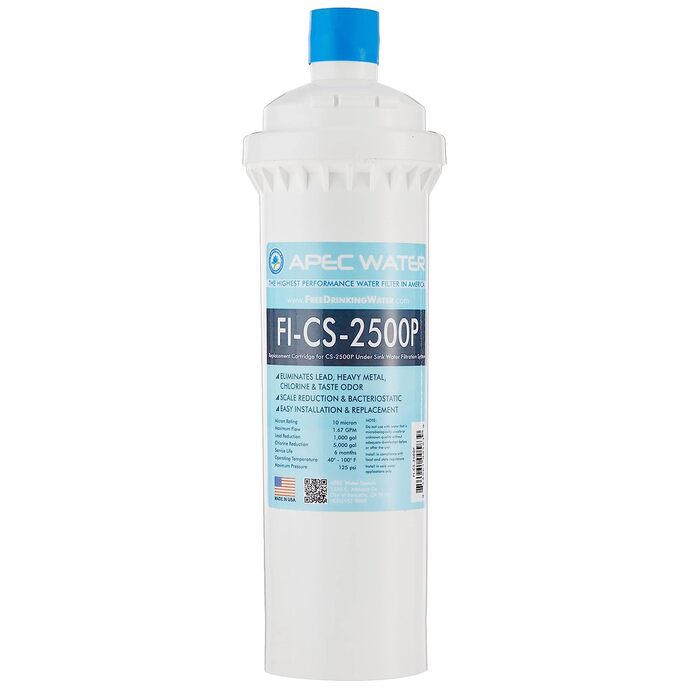
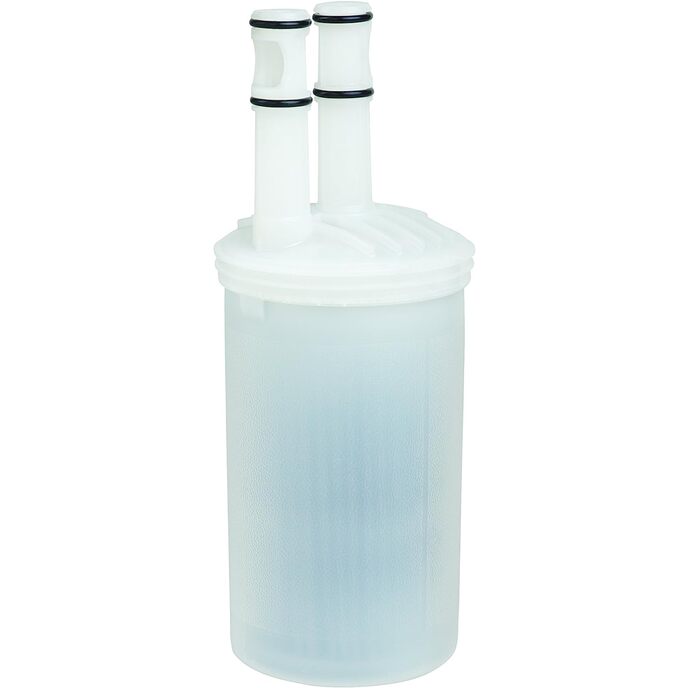
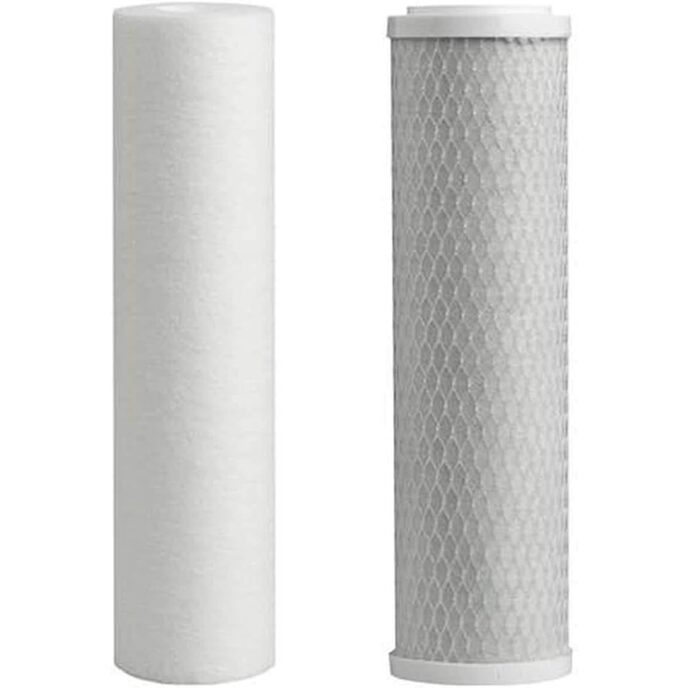
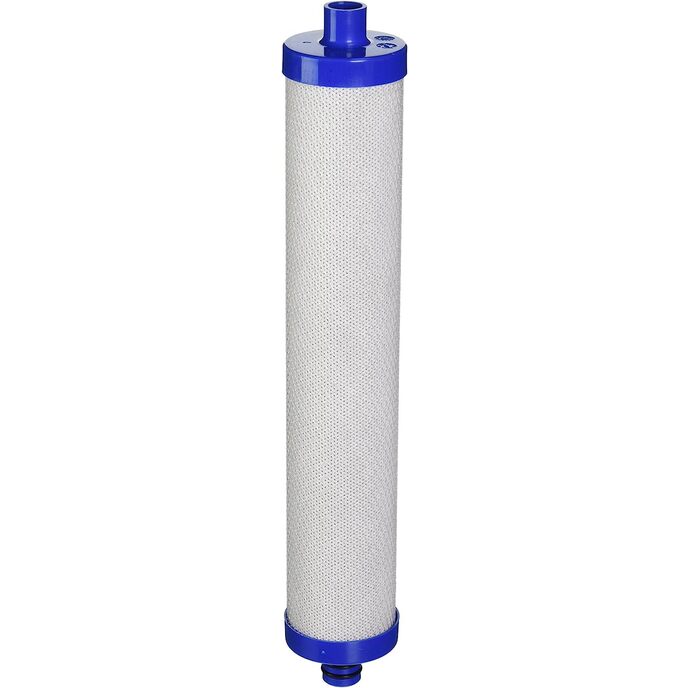
DESCRIPTION > Color: yellow. All yellow Premier filters are the same size and fit in the same housing. They come in 18, 24, 36, and 50 g/d capacities. You need to match the capacity to your system. My understanding is that if you install a higher capacity membrane, you may have to add a flow limiter to your system. As it turned out for me, my old membrane was a 36 g/d membrane---but the system seems to work well with the 24 g/d membrane. Note also that the black rubber gasket of my 10-year old membrane was at the other end, but does not seem to matter. > This filter is 24 gallons per day, which you should check to see if it matches your existing system. > Genuine Watts #11009---which is important because Watts membranes have a built-in check valve. If you use a non-watts membrane, you may have to add a check-value to your system. > Measurements: 11 1/2" long overall; body 1 3/4" diameter; to fit in a 2" diameter tube > Comes with instructions, which aren't great. But did not exactly apply to my 25-year old Watts Premier system, because the housing of more modern Premier RO systems has been redesigned. I needed to grab the end of the old filter with pliers to pull it out. One end has two O-rings (shown in the photo on the far lower right), the other does not have O-rings but is notched. Pay attention to which way your old membrane was installed. It is as good idea to take photos with your cell phone for each step in disassembly. SUGGESTIONS > Consider replacing all the other filters at the same time---you'll get more life out of the membrane. > I suggest that you start any maintenance by cleaning the black waste-line (so that later cleaning will not accidentally contaminate your new filters). See below. > Consider replacing your tank at the same time---the rubber diaphragm in the tank has a limited life (probably 5--10 years). > Silicon grease is perfect for lubricating the O-rings for the best seal. However, you don't want silicon grease to leach into your drinking water. So if you use silicon grease on the O-rings, be sure to wipe off all excess---just a few molecules thick will do the job.Permatex PERMATEX DIELECTRIC GREASE 22058 > Silicon grease is also helpful on all the "threads" where the filter housings screw together---it allows you to easily tighten them tighter that you could easily otherwise---and when it comes time to replace the filters, the housings should unscrew easier. PREMIER RO WASTE-LINE MAINTENANCE---a good idea to do before you install the membrane filter. > After about 6 months of use, the black waste-water tube can become clogged with a bacterial mat. If you pay attention, there is an odd choking gurgling sound when the tube is almost clogged. When it is clogged, the waste water will leak from the faucet itself out onto your counter. The solution (i.e., to prevent clogging of the line) is to regularly clean-out the black waste-water line. An 18" length of "weed-whacker" cord works well. Detach the black tube from your sink waste-line, and feed the "weed-whacker cord" into the tube and scrub it out. If you've had a root-canal procedure, you know how it's done. Note that the bacterial mat is a nasty sludge---have an old cloth towel handy to catch the gunk. > About 1 1/2 years ago I purchased a "beer line brush" Draft Beer Line Hose Cleaning Brush: 3/16" diameter, which worked well the one time I used it (the 1/4" diameter model might work better). However, it also occurred to me that I could squirt a few drops of Clorox into the air gap to prevent the bacterial mat from forming. Since I've been doing that once every few months, the waste line has not clogged up, so, I haven't needed to use the brush. The following bottle, which works well for this purpose is $3 at the Container Store Nalgene Plastic Drop Bottle. A Beachcombers! 1/2 Oz & 1oz Soft Squeeze Fine Metal Tip Moroccan Blunt Needle Syringe Type Body Art Henna Tattoo Applicators, 5 Tips 4 Bottles would probably be even better. > The air gap is literally a "gap", that is, an open space, or "well", located is beneath the lever, opposite the giraffe neck. For access to Premier faucets with flat sides (without an access hole on the side), pull the giraffe neck straight up and out, then slide the lever forward (in the direction of the giraffe neck). Drip few drops of Clorox into the "well" Do NOT disturb the small black plastic insert---it is the tiny "faucet" where the red water line discharges "brine" into the air gap or "well". To reassemble, push the lever backward (in the direction of the air gap), so that the legs slide under the "T", and then push the giraffe neck back into place. In Premier faucets which have domed bodies (without the flat sides), the air gap is accessible via a hole on the same side as the lever---perhaps for the very purpose of making the air gap easier to sanitize. If you install a domed-body faucet with the lever toward the sink, the hole is most easily accessible. > Click on “Stoney” just below the product title to see my other reviews, or leave a comment to ask questions.